Everything you need to know about the Shimano Di2

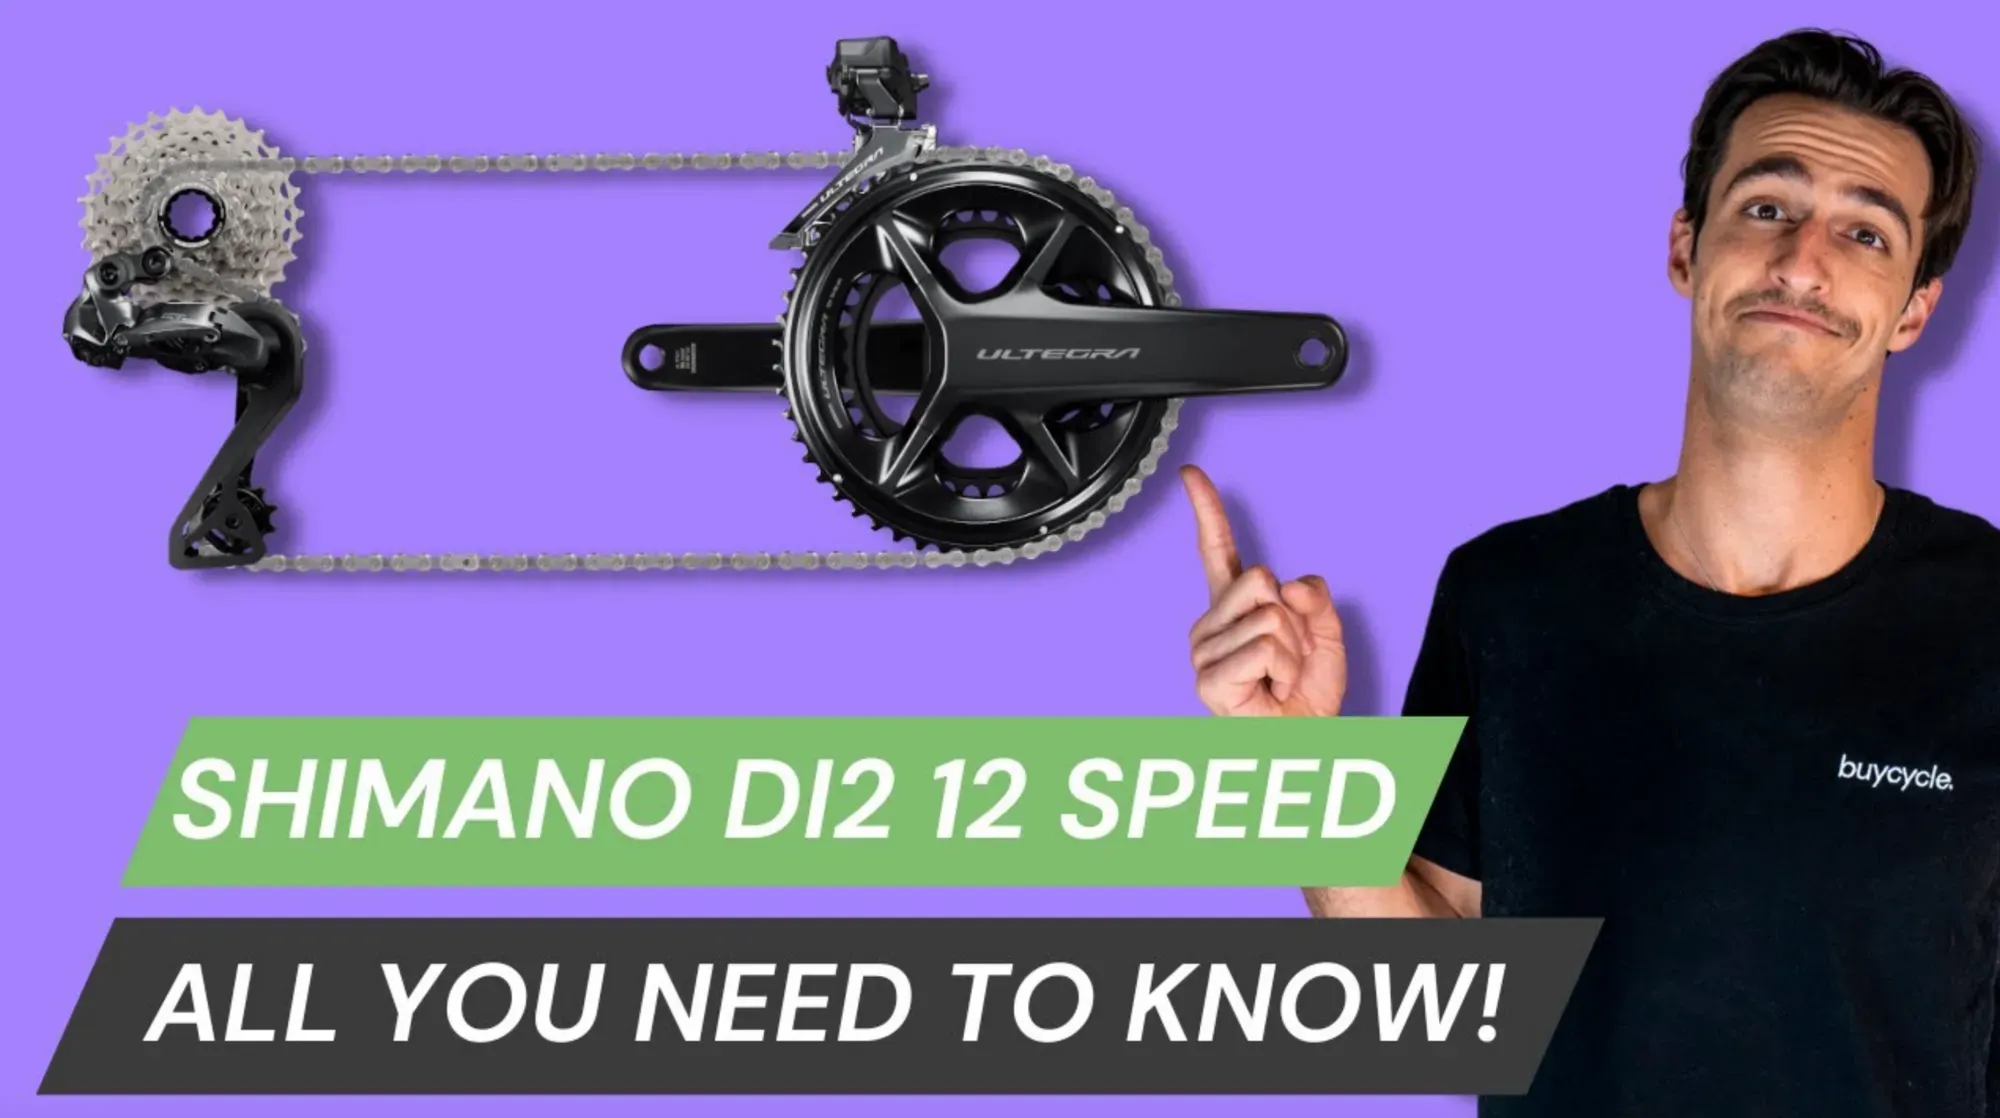
The Shimano 12-speed Di2 groupset
For many, the Shimano 12-speed Di2 is the queen of the shifting groups. So that you can also get the full potential out of it, we at buycycle have summarized all the most important tips and tricks around the electric circuit. In Nic's YouTube video and in this blog post you will learn everything about the 12-speed Di2, from the battery check, the different modes and the fine-tuning of the front derailleur, to the E-Tube app!
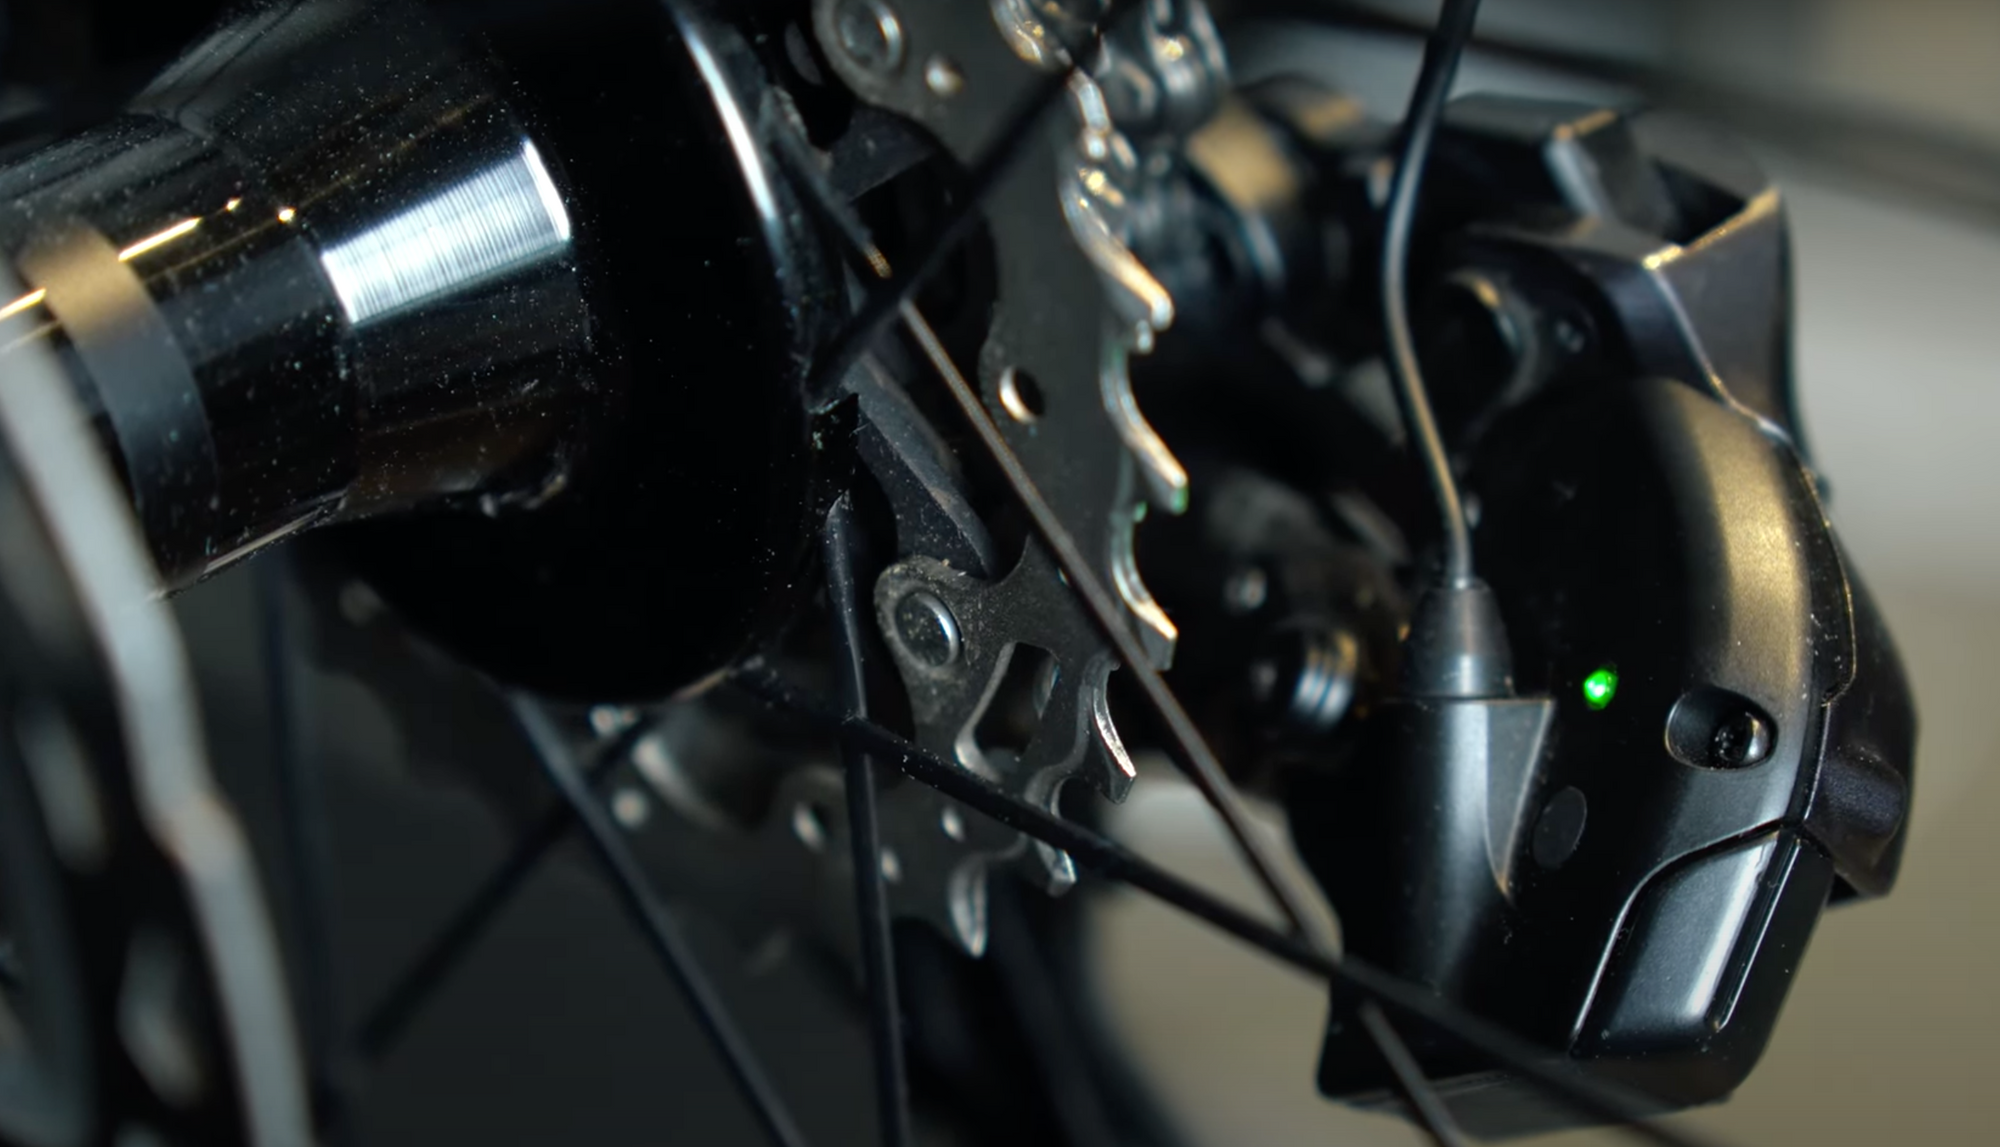
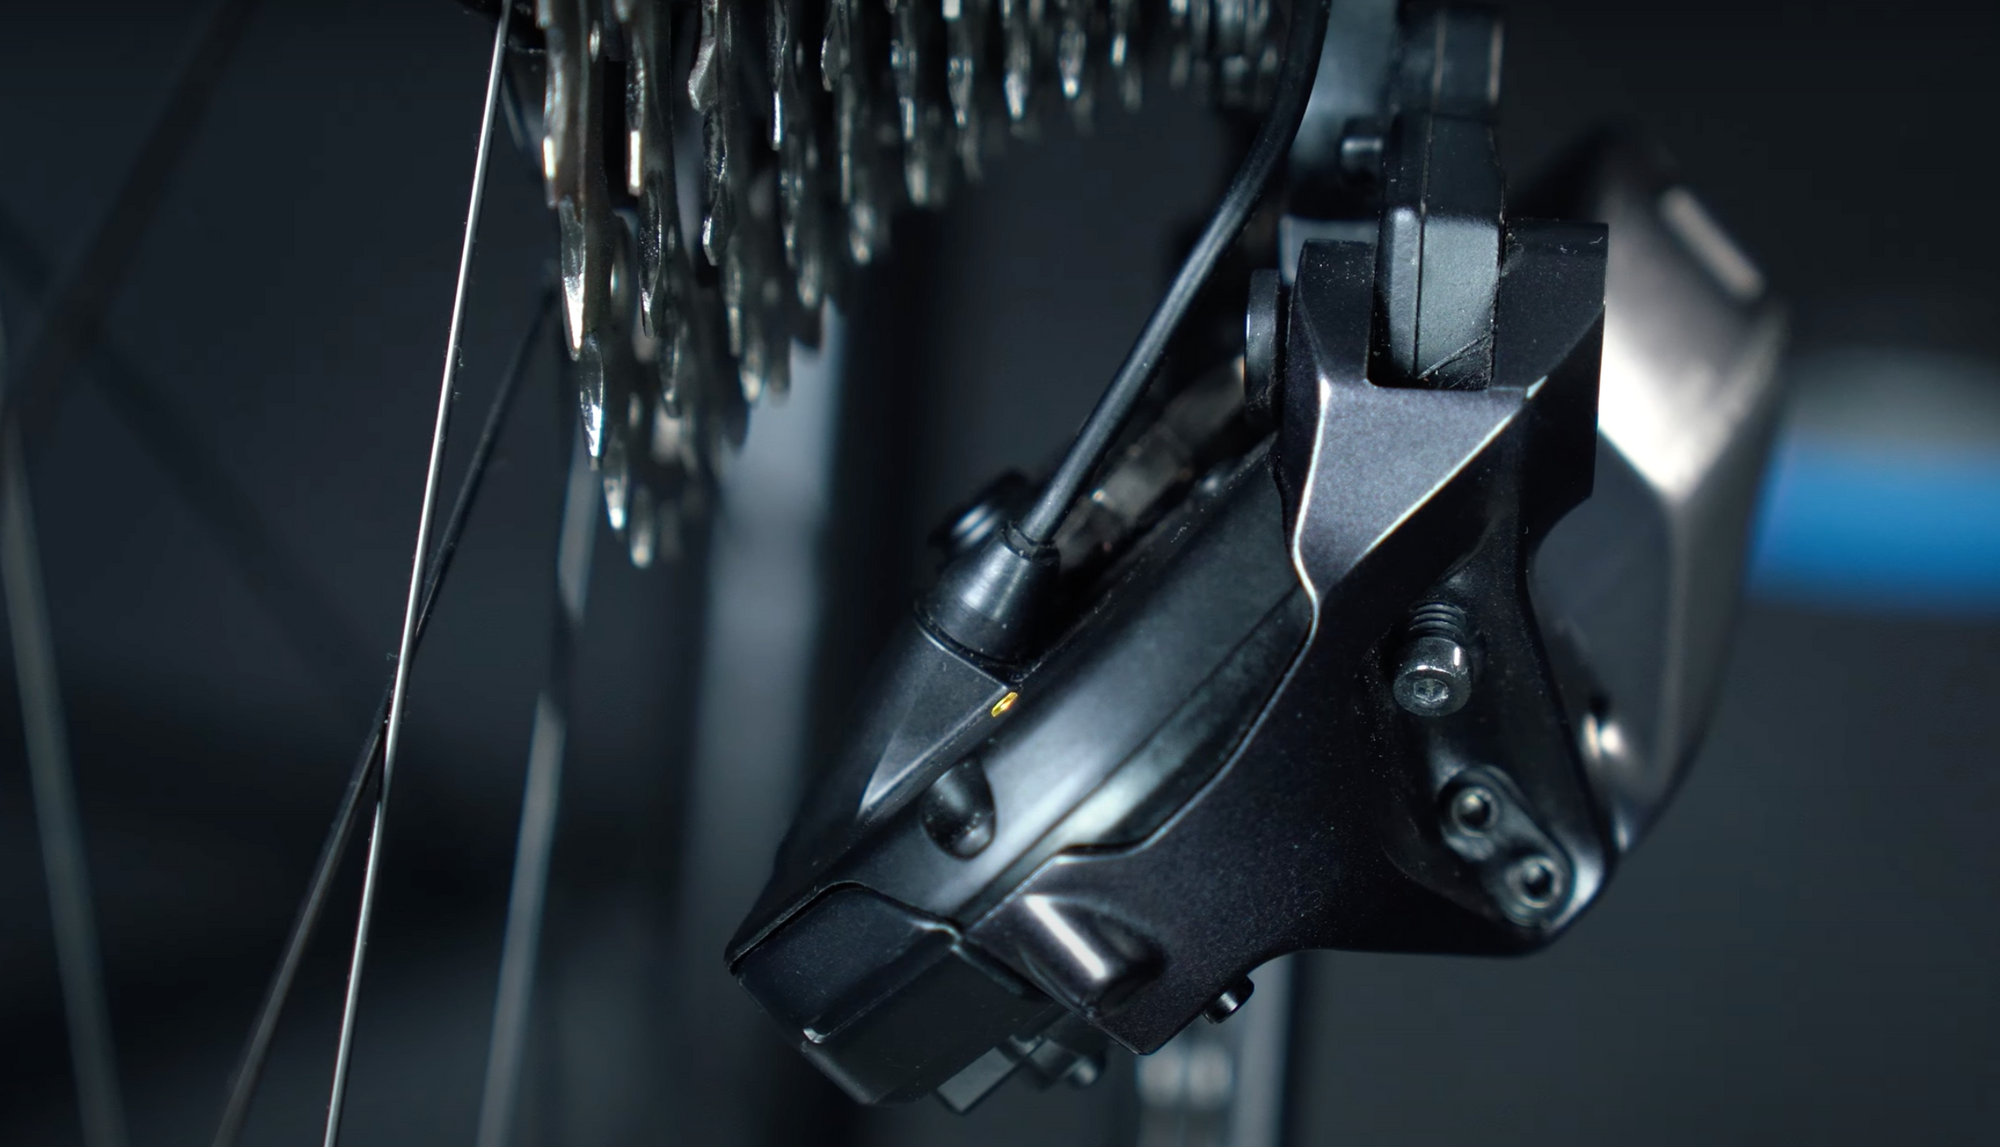
Let's start with the function button: it is the alpha and omega of any adjustments you can make and is located on the outside of the rear derailleur on the newer models. On the inside, you'll find a small LED light that shows you all the information you need in the following steps.
1. Battery check.
To check the battery status of your Di2, click the function button once. The battery is charged between 100% and 50% if the LED is permanently green. If it flashes green, it is between 50% and 25%. If the LED lights up red or completely off, you should reach for the USB cable and recharge the battery.
The central battery of the Di2 sits mostly in the seatpost. Still, the cable that was supplied to you in the normal case, you can simply connect to a USB charging cable and plug in the charging socket on the rear derailleur left by folding up the protective device of rubber briefly. However, ensure you insert the plug correctly and do not use force to avoid damaging the charging socket.
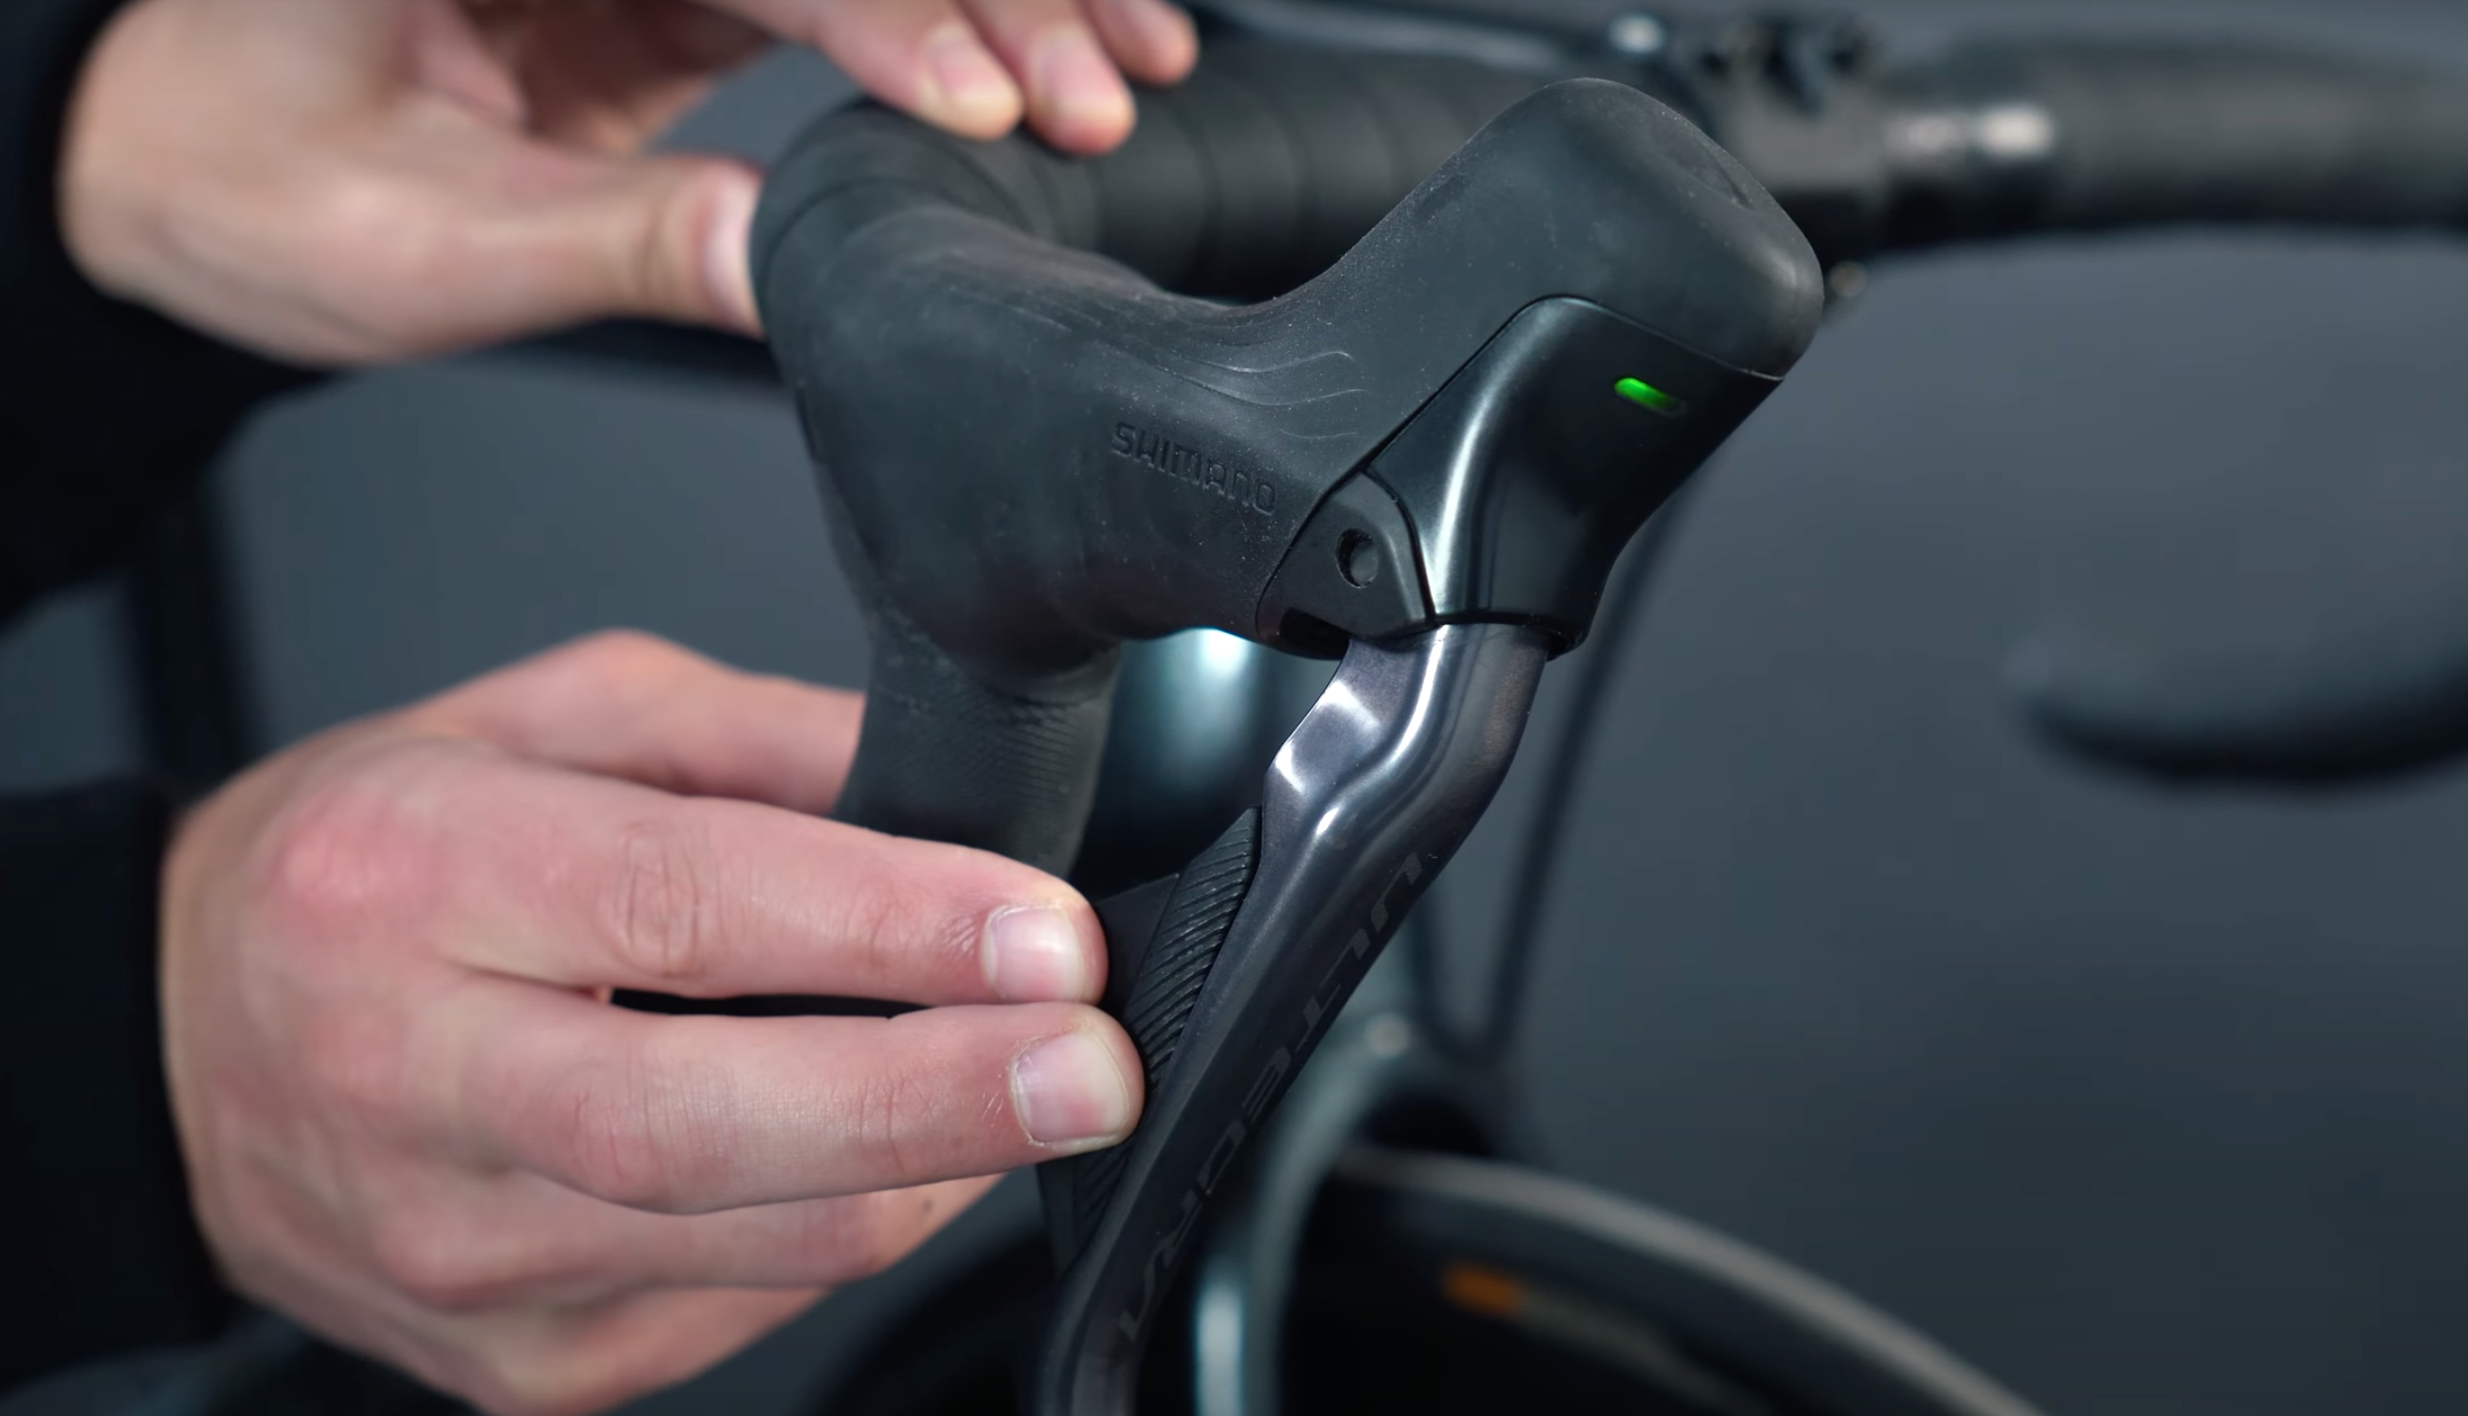
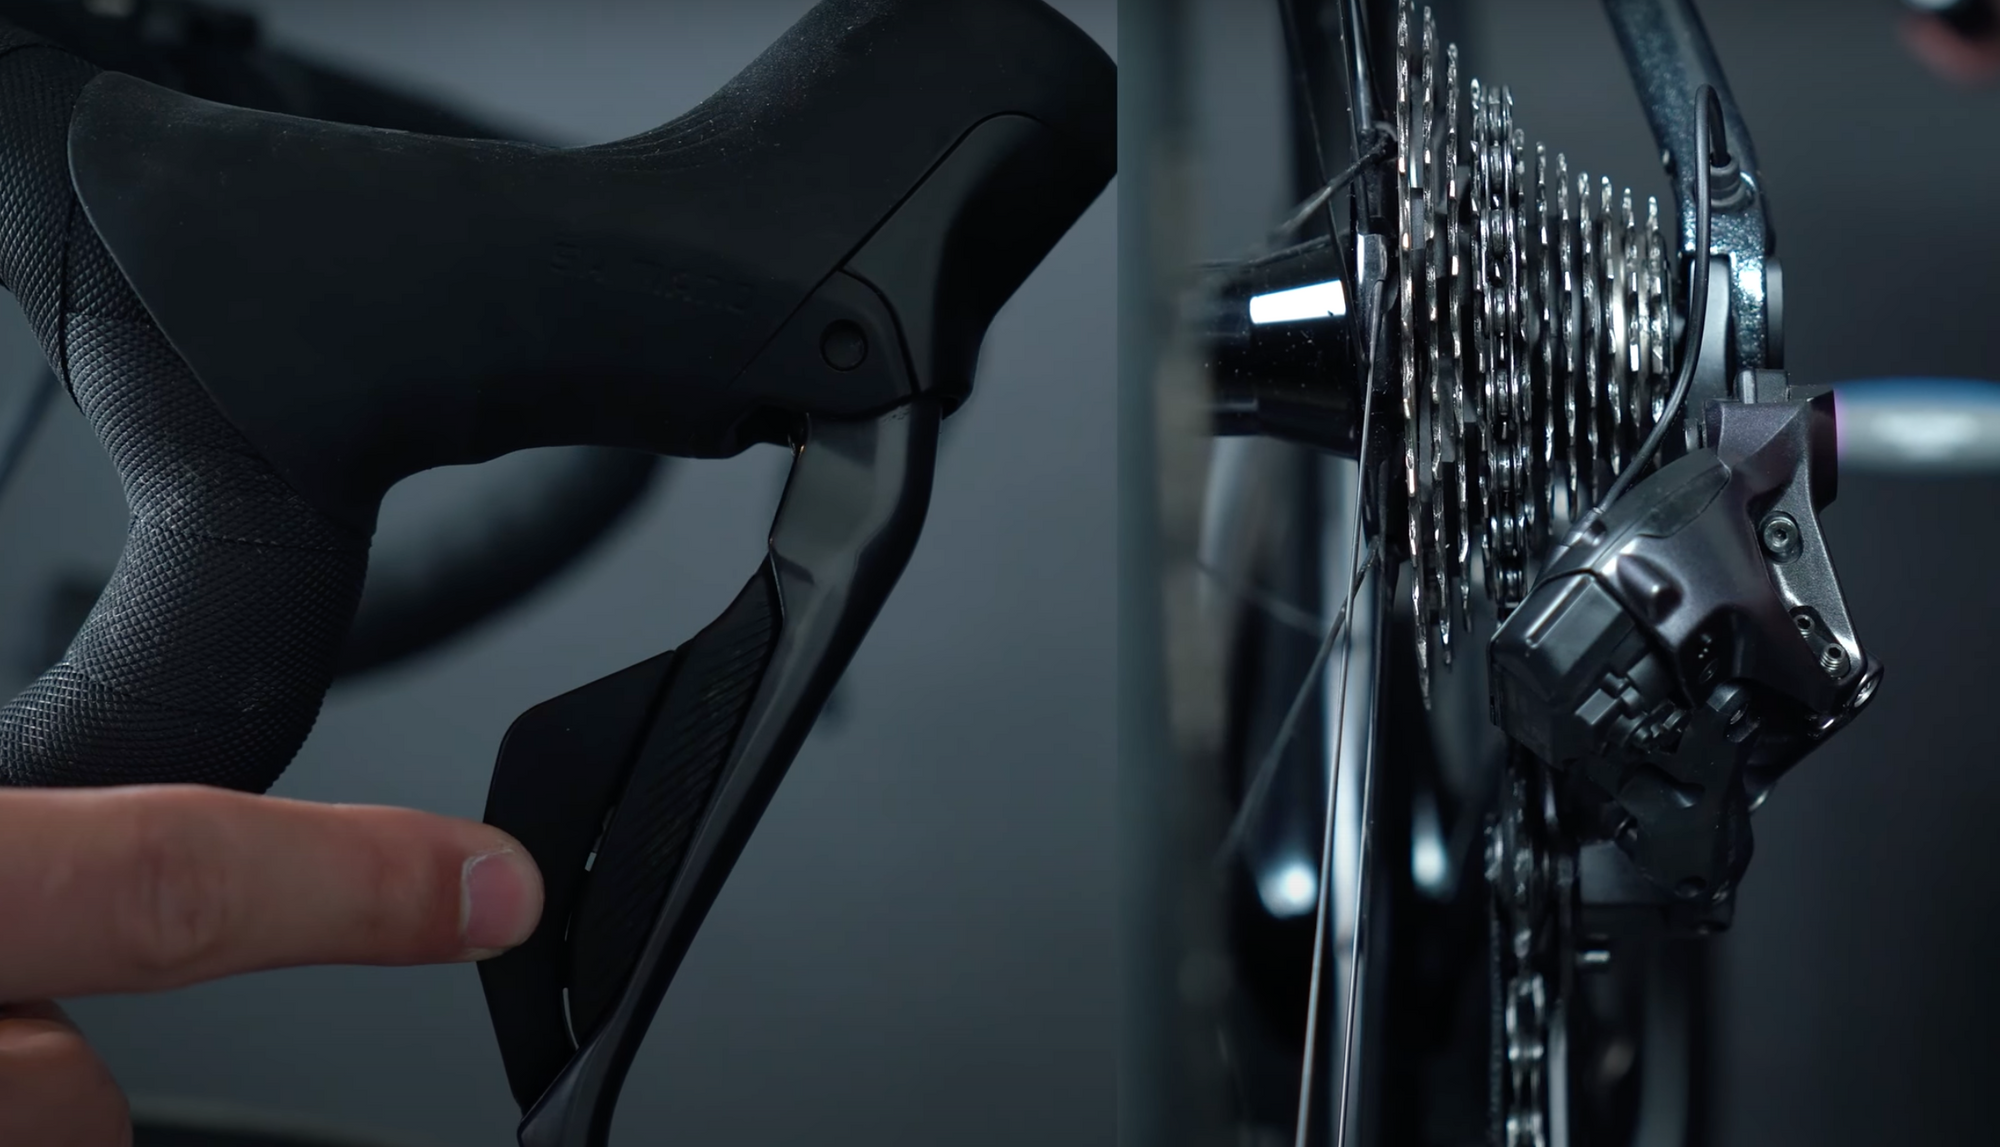
The shift levers on the handlebars are not connected to the central battery but are powered by their own button cell batteries. To check their status, press both shift buttons on one lever simultaneously, and as long as the LED on the hood is green, you can cycle and shift with peace of mind. If this LED lights up red, the batteries are only under 10% charged and should be replaced within the next month.
2. Switching modes.
The Shimano Di2 system offers three different shifting modes. In the first mode, you shift manually, using a mechanical shift group, and operate the front and rear derailleurs independently.
The second mode is the semi-synchronous mode. Here, the rear derailleur automatically shifts up or down to a corresponding sprocket when shifting on the front derailleur. This automatic adjustment ensures that you are always in a solid gear ratio and can be configured to shift up to 4 sprockets. However, the default setting of the semi-synchronous shift adjustment is designed for two sprockets.
The third and final mode is fully synchronized shifting. In this mode, the front derailleur automatically shifts up or down when the rear derailleur is shifted over a certain sprocket. Likewise, the rear derailleur automatically moves up or down to compensate for a change in the front derailleur. No matter how and where you shift in the third mode, you are always in the optimal gear ratio.
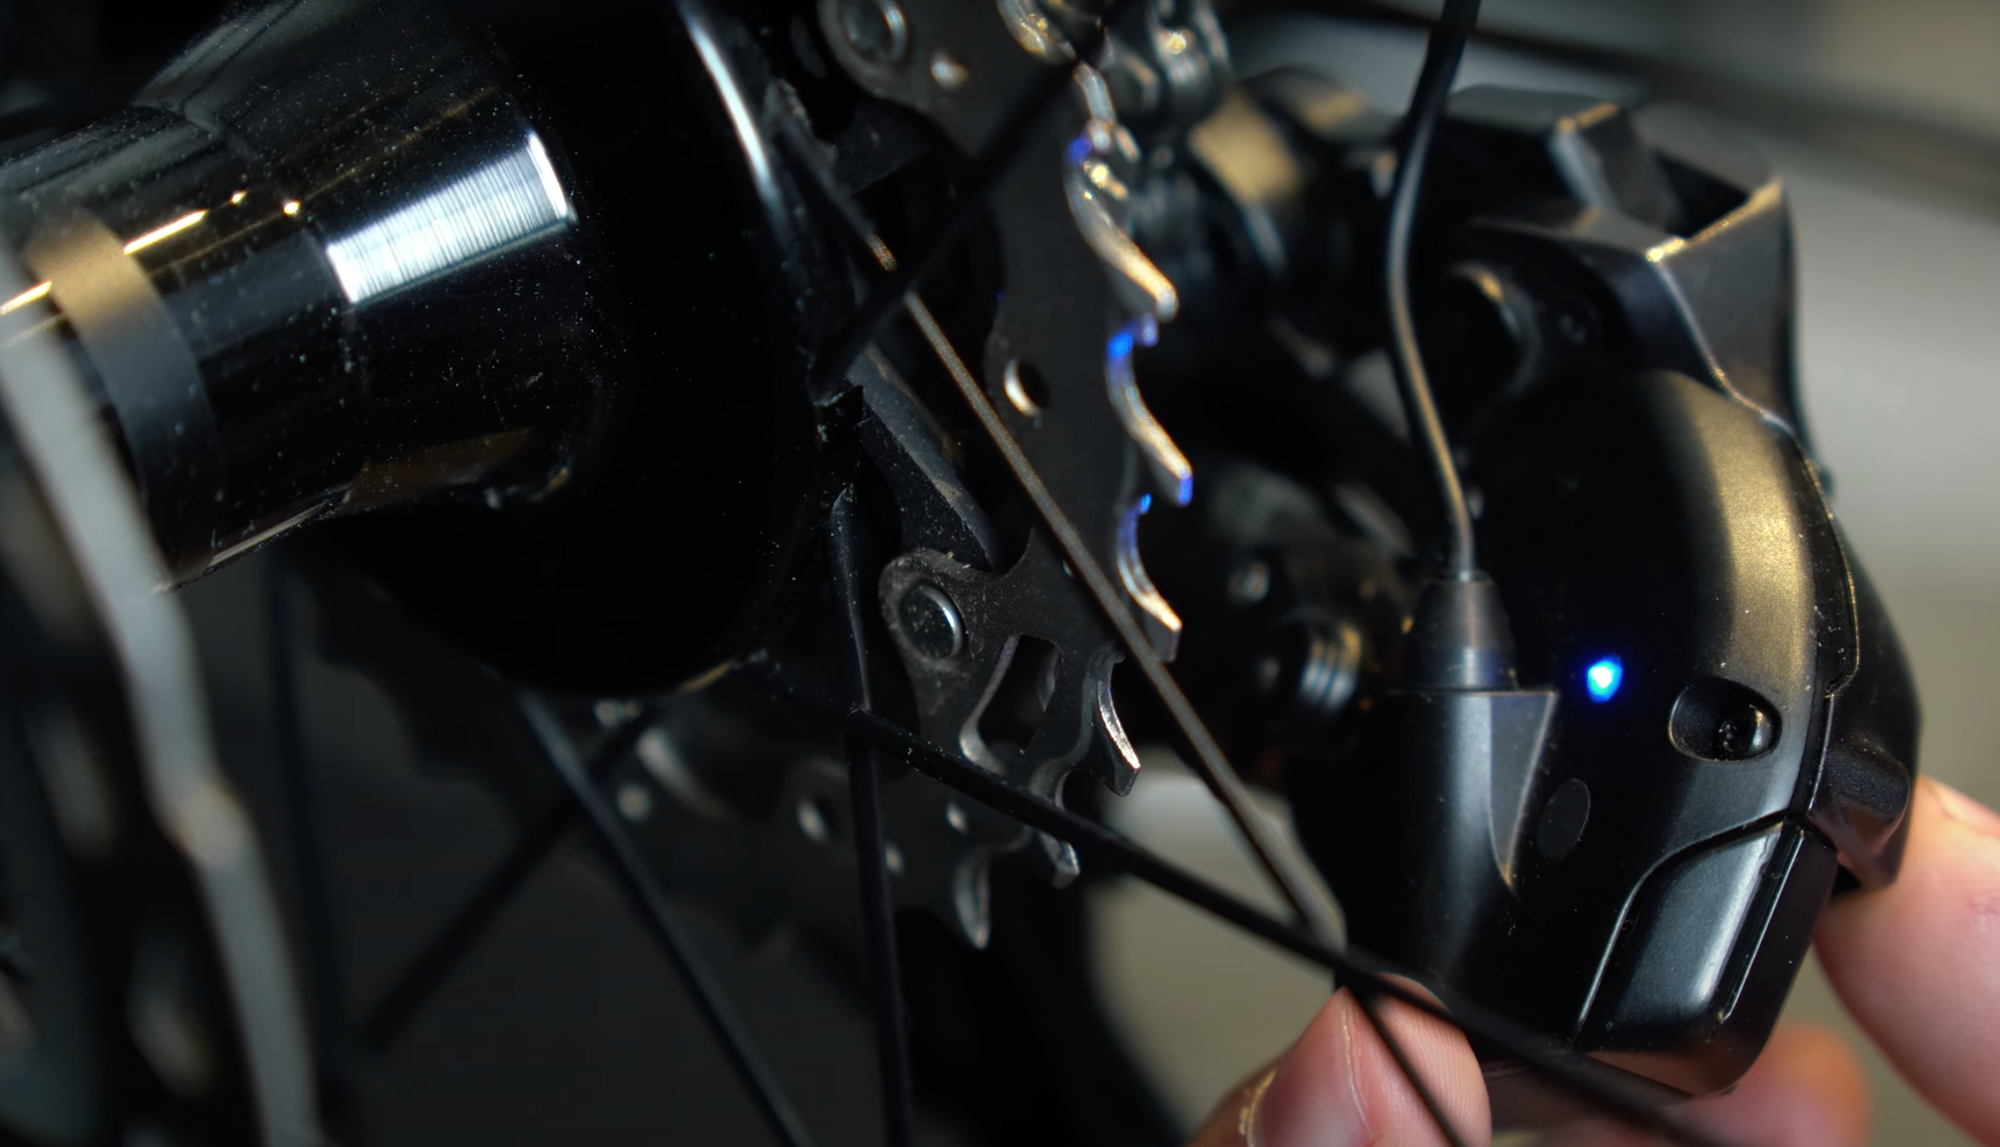
To switch from one mode to the next, turn back to the function key and press it twice quickly. When the LED is solid blue, you are in manual mode; when it blinks twice, you are in semi-sync mode, and blinking three times means you are in full-sync mode.
"If you want to briefly check which mode you are currently in without changing it, simply press the function key once, and the battery indicator will be followed by the blue light, which will tell you your current mode." - Alice Huot @buycycle
3. Fine-tuning of the shifting group.
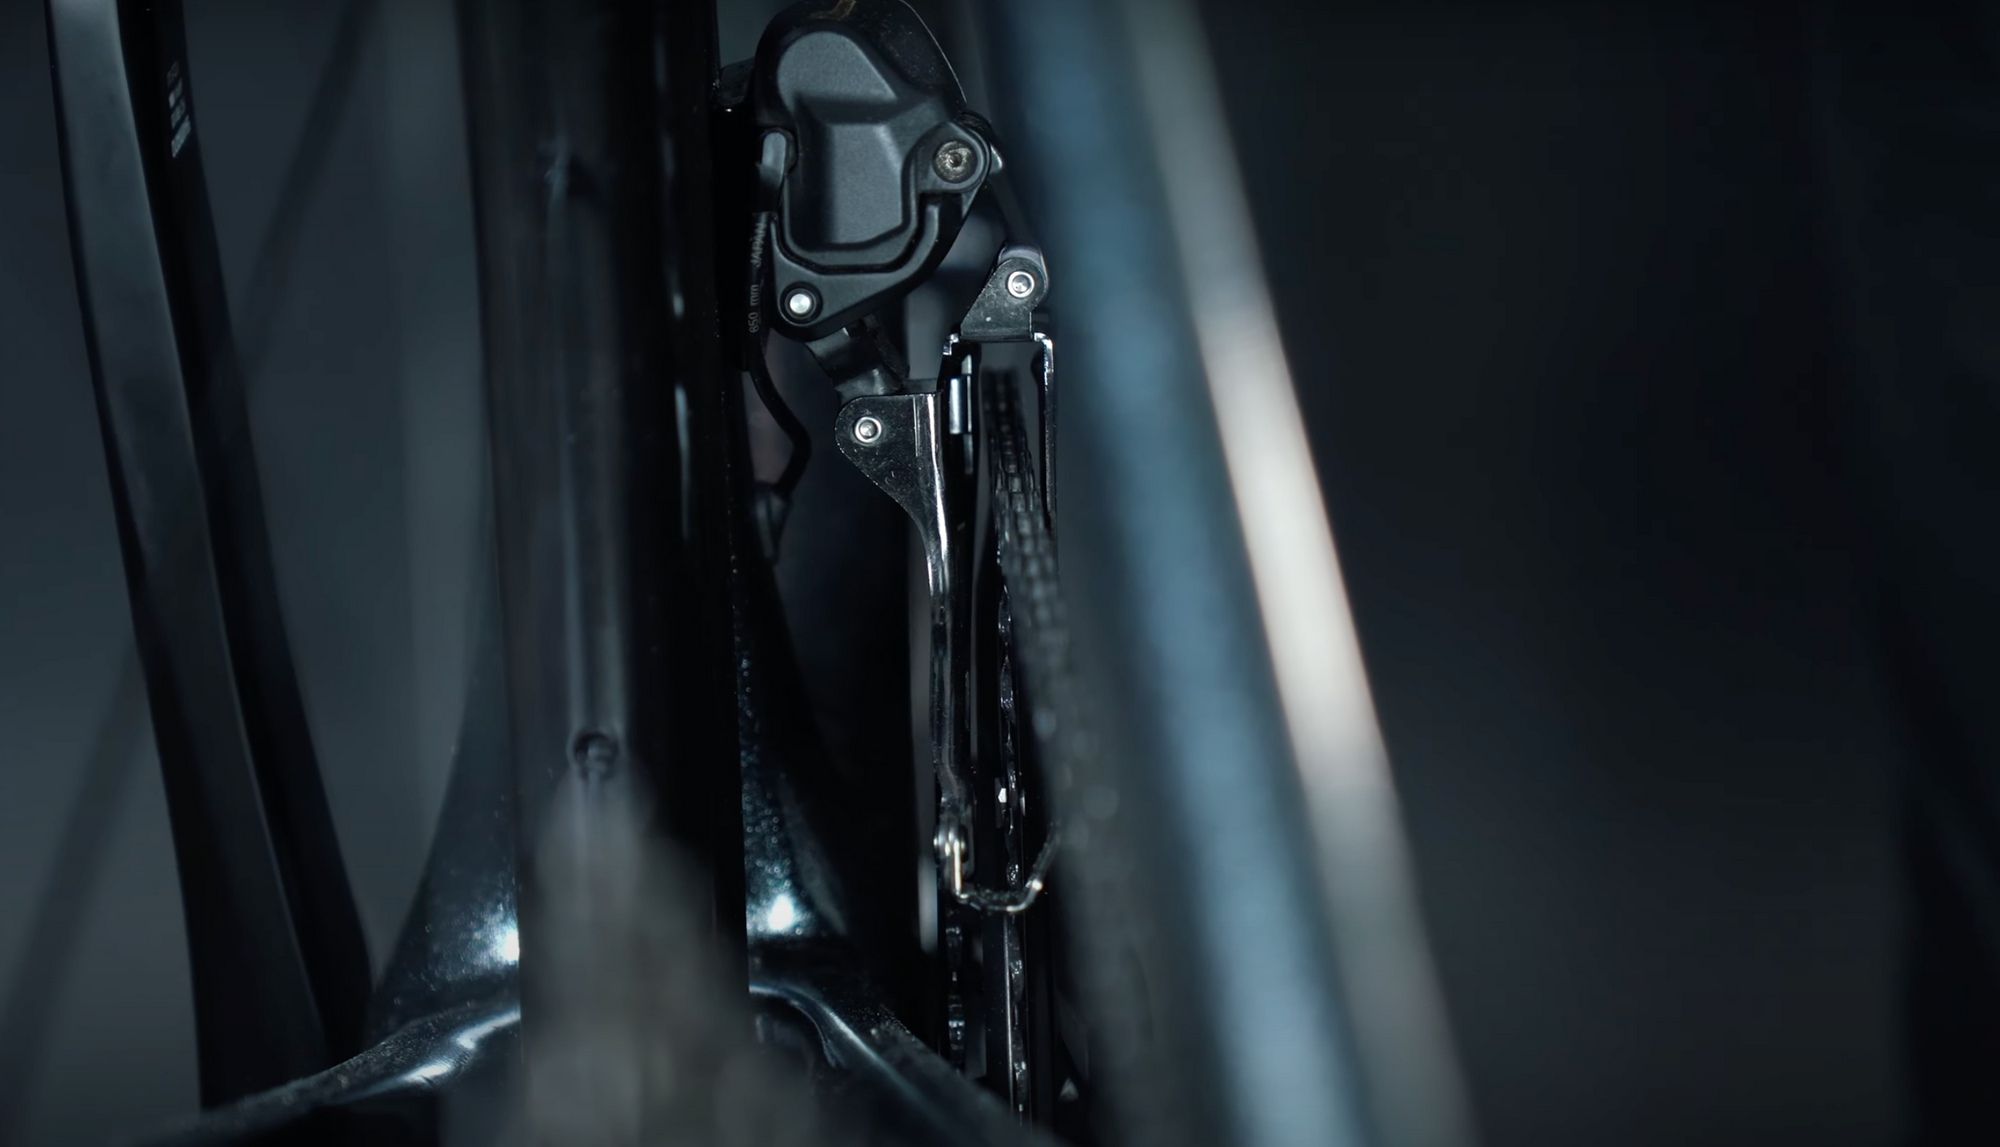
In the finer adjustment of the gearbox, starting at the rear derailleur, you will find the two limit screws and the B-tension screw.
The first step is to check the B-bolt. This can adjust the distance between the rear derailleur rollers and the cassette. However, this is usually already set correctly at the factory. To adjust, shift to the small chainring at the front and the largest sprocket at the rear (i.e. the lightest gear).
The distance between the guide pulley wheel and the largest sprocket varies depending on the cassette used. According to Shimano's user manual, the distance for Dura-Ace and Ultegra cassettes should be as follows:
- 11-28T - 18mm
- 11-30T - 14mm
- 11-32T - 10mm
- 11-34T - 6mm
For 105-casettes:
- 11-34 - 10mm
- 11-36 - 6mm
Once the B-screw is correctly adjusted, the next step is to fine-tune the gears. To do this, shift the chain to the fifth sprocket from the bottom. The chain must lie precisely on the middle sprocket. Then, hold down the function button until the LED lights up yellow, confirming that you are now in adjustment mode. From here, you can fine-tune the rear derailleur by pressing the buttons on the right shift lever.
"When you shift up, the rear derailleur moves inward; when you shift down, it moves outward." - Anja Benson @buycycle
Shift up until you hear the chain rubbing as if it wants to shift to the next sprocket. Now shift down 5 times or press the corresponding rear derailleur button 5 times. Your jockey wheel on the rear derailleur should now align with the sprocket. A final check never hurts. Shift through all gears once to ensure everything is running smoothly. If not, repeat the entire process and downshift only 4 times this time instead of 5.
Now, you can turn to the front derailleur and adjust the upper and lower limit. This prevents the chain from rubbing against the front derailleur and ensures it does not fall off the chainring. Shift to the largest chainring and the smallest sprocket to set the upper limit. Then, go back into adjustment mode and start fine-tuning the front end using the buttons on the left shifter.
"The goal is for the distance between the chain and the outer plate to be 1 mm. Then, click on the function button again to exit the setting mode." - Alice Huot @buycycle
Shift to the smaller chainring and the largest rear sprocket to set the lower limit and repeat the process. At the latest, your gear should run properly.
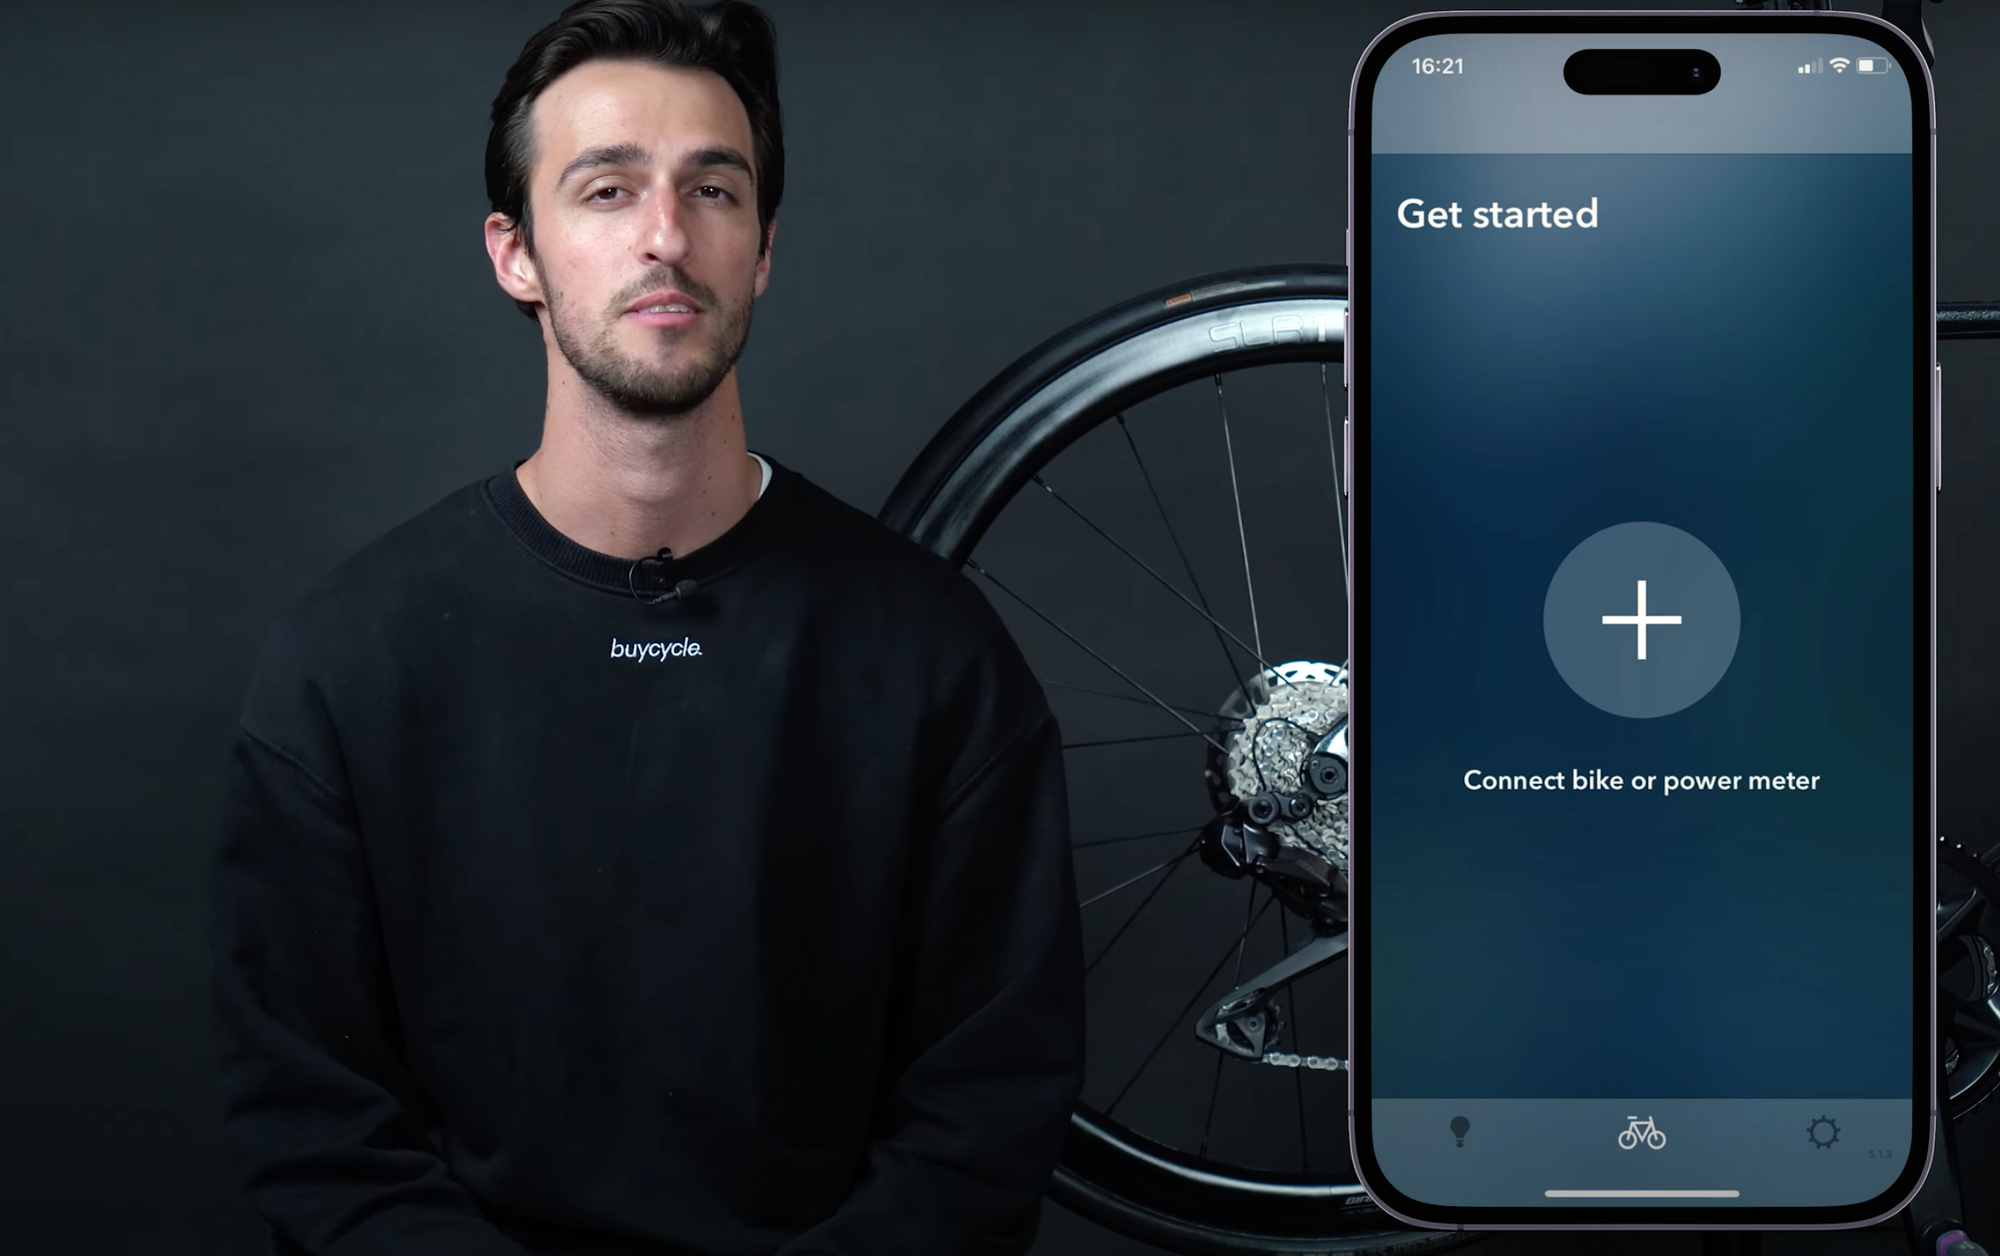
4. E-Tube app.
With the E-Tube app from Shimano, you can configure the modes even more precisely and adjust the buttons, check the battery status, and update the firmware. Download the E-Tube Project app and connect it via Bluetooth with the Di2.
To do this, press the function button on the rear derailleur until it flashes blue, and your shifting group is thus ready to be paired. Then follow the steps displayed in the app and once your bike is connected, you can use the full Di2 potential.
So much for the Di2 circuit: For questions about the Shimano shift groups is our team is always there for you and if you need further tips and tricks around the bike you can have a look at our numerous other blog articles! And if you are so enthusiastic about the Di2 now that you want to ride it immediately, then we surely have a suitable used bike for you on buycycle.com. Until then, we wish you first of all: Happy indexing, happy cycling!
Components guide
- Bike components guide: what are the parts of a bike?
- What bike parts to upgrade first?
- How much do bike parts cost?
- Where to buy bike parts?
- What are the main gravel bike parts? Check out our guide to gravel bike components!
- What are the main mountain bike parts? Check out our guide to mountain bike components!
- What are the main road bike parts? Check out our guide to road bike components!
- How to convert a road bike to a gravel bike? Is that even a good idea?
- All things suspension travel
Gearing system
- Everything you need to know about the Shimano Di2
- Shimano Claris review: lifting the lid on the Shimano’s most accessible road bike groupset
- All about the Chinese L-TWOO eRX shifting group
Wheels and tires
- Tubeless tires - What are the advantages?
- Going Tubeless
- Gravel tires on road bike: A genius move or a misguided choice?
- Schwalbe tires recycling
- Everything about the tire size of your bike
Breaks
Pedals
Saddles
- Best MTB saddles: saddle up for the trails
- Best road bike saddle: the seats that can’t be beat
- How to calculate your ideal saddle height
Bags
Electronics
- The best bike gadgets 2024
- The buycycle bike computer test
- Everything about road bike gears
- The bicycle power meter
Bike Maintenance
Others
- All things (road) bike locks
- Safe on the bike: All things road bike helmets
- The most important info about the road bike handlebar
- Wrap handlebar tape correctly
Road bike buying guides
- Which road bike is right for me?
- Which endurance bike is the best?
- Best aluminium road bikes in 2024
- Best road bikes under $2.000 in 2024
- Best carbon road bikes in 2024: Our top 5 ultimate picks!
- Carbon road bikes: What are they?
- Trek road bike comparison
- The buycycle road bike guide
- Mountain bike vs road bike: Which one is best for you?
Road bikes reviews
- Cube Agree C:62 Race Review
- Focus Izalco Max 2024 Review
- Focus Izalco Max 9.8 Review
- BMC Roadmachine 01 TWO Review
- Trek Domane AL 2 Review: The ultimate affordable road bike for beginners and beyond
- Trek Madone vs Domane: which is for you?
- Specialized Aethos vs Tarmac: What is the model for you?
- Canyon Ultimate vs. Aeroad: find the best Canyon road bike for your ride
- Trek Domane vs Specialized Roubaix: Which bike is best?
- Specialized Tarmac vs Roubaix: how to decide between the two?
- Trek Madone Gen 8 Review
Top road bikes
- Best beginner road bike: Our top 5 best road bikes for beginners
- Best road bikes for women: Our Top 5 picks for 2024
- Best steel road bike in 2024: our top 5
- Best steel road bikes: Get to know which are the top steel road bikes for 2024?
- Best titanium road bike in 2024: our top 5
- Best titanium road bikes: Our top 5 picks to discover the power of titanium
- Top 5 aero road bikes
- Best carbon road bikes in 2024: Our top 5 ultimate picks!
Road bike sizing guides
History & brands
Road bike gear guides
- Bike helmet size chart and how to measure for a bike helmet
- Best road bike saddle: the seats that can’t be beat
- Everything about road bike gears
- Gravel tires on road bike: A genius move or a misguided choice?
- How to convert a road bike to a gravel bike? Is that even a good idea?
- All things (road) bike locks
- The most important info about the road bike handlebar
- Wrap handlebar tape correctly
- Winter road bike shoes: are they necessary?
Road bike selling guide
Road bike winter cycling
- Winter road bike shoes - are they necessary?
- Winter road bike tires: The best tires for cold-weather rides
- Top 3 Spanish winter cycling destinations: Mallorca, Calpe, and Tenerife compared
Buying guide
- Should I buy a new or used bike?
- What is better: buying or leasing a bike?
- How much does a bike cost?
- How to choose a gravel bike?
- How to choose a mountain bike? Discover our mountain bike buying guide
- How to choose a triathlon bike?
Brands guide
- What are the best road bike brands in the US?
- What are the best bike brands in the USA?
- Scott vs. Cube: What makes these top bike brands unique?
- Trek vs. Specialized: which brand really suits your style?
- Cannondale vs Trek: battle of the biggest
- Cannondale vs. Specialized: discover which bike brand leads the pack
- Giant vs Speiclalized
- Canyon vs. Specialized
Where to buy a bike?
- What are the best bike outlets in the US?
- How to buy a bike at Rose Outlet
- Buy a bike at Canyon Outlet
- How to buy a bike at the Cube factory outlet?
- Bicycle blue book: the right choice for evaluating, selling, or buying a bike?
- Buy a bike on Ebay
- Craigslist bikes vs buycycle: what is the best place to sell or buy a used bike in 2024?
- Facebook marketplace vs buycycle: where to buy or sell your bike?
- Pinkbike: The best place to buy and sell a used bike?
Sizing guide
- Everything about the tire size of your bike
- Bike helmet size chart and how to measure for a bike helmet
- Bike size chart: What size bike do I need?
- Bike wheel size chart: what wheel size bike do I need?
- How to make sure you buy the right-sized second-hand bike
- All about frame height for a road bike
- All about frame height on a mountain bike
- Road bike size chart: Your guide to the perfect fit